-
-
-
-
-
-
-
Treibball Equipment Resources
-
-
-
-
-
-
-
-
-
Treibball Equipment Resources
Like many dog sports Treibball has specialized equipment requirements. Look here for ideas of where to purchase or how to build your own.
This page is intended to be a starting point, not an exhaustive list. We are always interested in learning new sources for things or different approaches to constructing your own props for practice or video titling. If you find a good resource for equipment or a different way to build something, please share on the Facebook Members page or with a member of the NATE Training committee. We'll try to update this page as well!
|
|
|
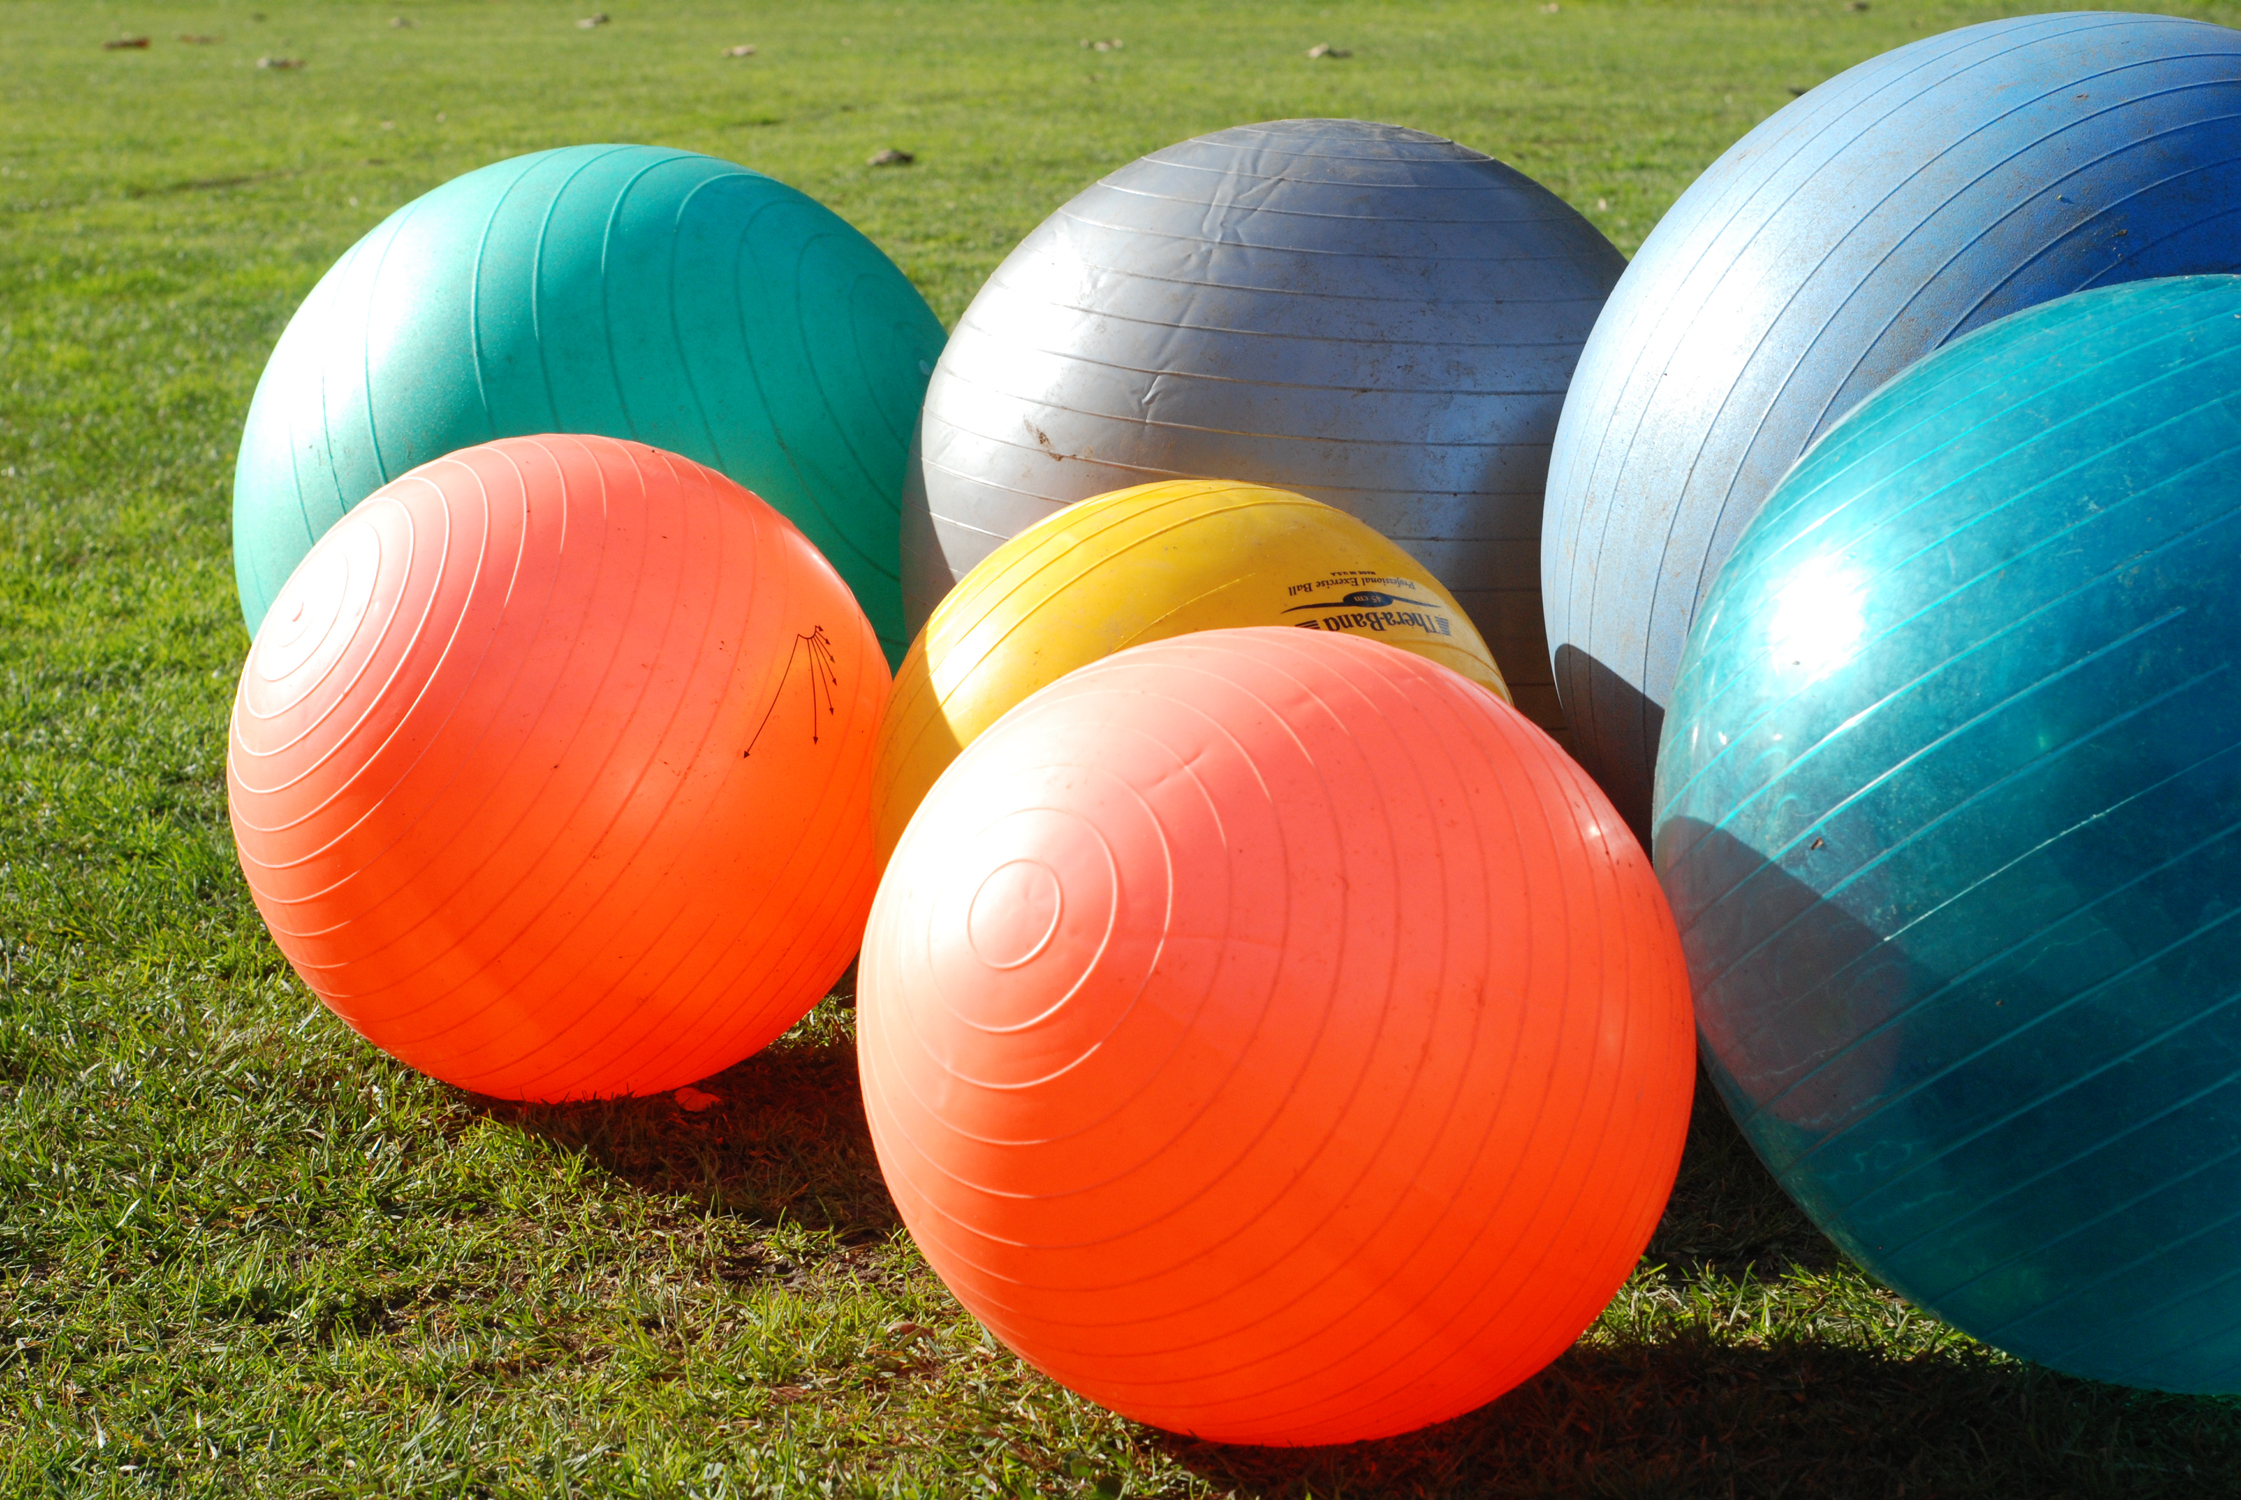
Height Class |
Ball Size |
Allowable Size Range |
Ball ½ Circumference |
|
Mini |
25 cm |
18 cm-30 cm (7” – 11.5”) |
28 cm - 47 cm (11” – 18”) |
|
X-Small |
35 cm |
30 cm-40 cm (11.5” – 15.75”) |
47 cm - 63 cm (18” – 24.75”) |
|
Small |
45 cm |
40 cm-50 cm (15.75” – 19.75”) |
63 cm - 78.5 cm (24.75” – 31”) |
|
Medium |
55 cm |
50 cm - 60 cm (19.75” – 23.5”) |
78.5 - 94 cm (31” – 37”) |
|
Large |
65 cm |
60cm -70cm (23.5” – 27.5”) |
94 cm- 110 cm (37” – 43”) |
|
X-Large |
75 cm |
70 cm - 80 cm (27.5” – 31.5”) |
110 cm – 126 cm (43” – 49.5”) |
Stabilizer Rings
The use of Stablizer Rings are described in Chapter 5 of the NATE Handbook.
Rings are optional but definitely aid in quick ball placement, ball stability on uneven surfaces, and defense against movement on windy days.
Tubing or hose are specified as the preferred material for the rings. Section 19 in the handbook provides detailed size and construction information utilizing tubing and a short length of wooden dowel or smaller tubing. It includes a chart listing the optimum tube diameter and final ring size based on height class and the corresponding ball size.
For practice members have been creative in selecting their stabilizers, utilizing such things as floral rings, needlepoint hoops, and Frisbees!


Suggested Stabilizer Size by Height Class
|
Height Class |
Ball Size (cm) |
Tubing Outer |
Tubing Length (in) |
Approximate Ring |
|
Mini |
25 |
0.5 |
20 |
6.25 |
|
XS, SM |
35, 45 |
0.5-1.0 |
24 |
7.5 |
|
Sm, Med |
45, 55 |
0.5-1.0 |
31 |
10 |
|
Med, Lg |
55, 65 |
0.5-1.0 |
38 |
12 |
|
Lg, XLg |
65, 75 |
0.75-1.0 |
44 |
14 |
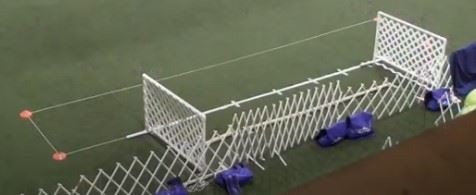
The Goal & Goal Line
The Goal requirements are described in Chapter 5 of the NATE Handbook.
Key criteria include that the walls of the Goal must be able withstand dogs playing balls off of them and the Goal line must be visible but not obstruct balls entering the goal.
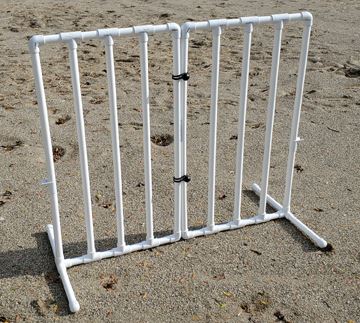
Goal Walls:
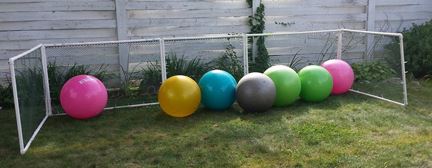
The Goal must have 3 sturdy walls minimally 3 ft tall and 15 ft long by 5 ft deep. An existing fence may be used as the back wall. The exterior of the side walls may be reinforced with sandbags. Feet on the corners and ends will aid in securing. The fencing set up must prevent balls from going behind the goal area.
Common materials for constructing the Goal are:- PVC pipe, T's, corners and elbows (1.5" OD recommended)
- Snow or Construction plastic fencing or lattice or other small web fencing material
- Zip ties
- Fence posts for more permanent installations
- Sandbags for reinforcing the sides
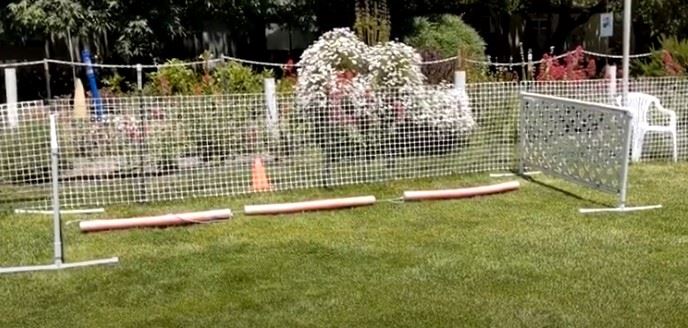
Below are some examples of Goals from our Membership. Thank you for Sharing!
From an Indy Treibball Club Match: Lattice goal sides with expanding fence and sandbags to stabilize. White tape and cord for goal line and handler box. Low cones marking corners of handler box.
From Christy Renee: Note multi-sections for back for portability.
From Amanda Fleischsmith: Note the feet for stability.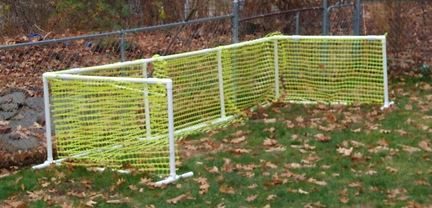
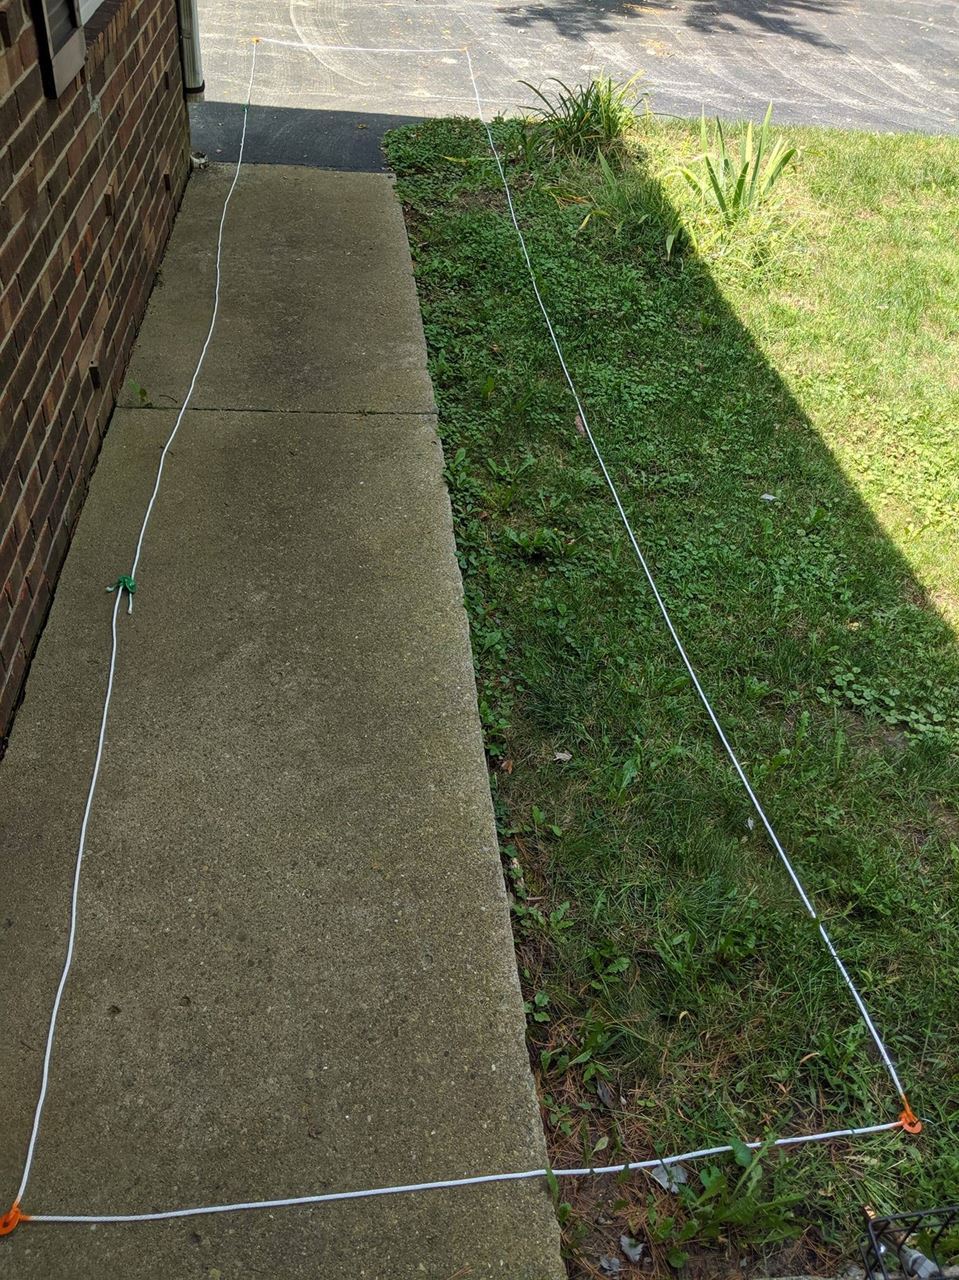
Goal Line: The Goal Line is the fourth side of the Goal, open to the handler area. The best material to mark the Goal line is very dependent on the location of the playing field. Tape may be highly visible on indoor artificial grass but completely invisible on an outdoor grass field. Here are some frequently used goal markers:
- Bright or fluorescent tape
- Cord or rope
- Chalk
- Christmas tree garland (tape, end weights or garden staples to keep in place)
- Spray paint
Goal Bumper to hold balls: An easy way to help keep the balls from rolling out of the goal is to get some pool noodles, string them on a cord, then stretch them across the middle (not the front!) of the goal. Be sure to weight or tie down the cord ends to keep the noodle line relatively straight to prevent a tripping hazard. An example is shown below from the late Sandi Pensinger at Living With Dogs training center.
|
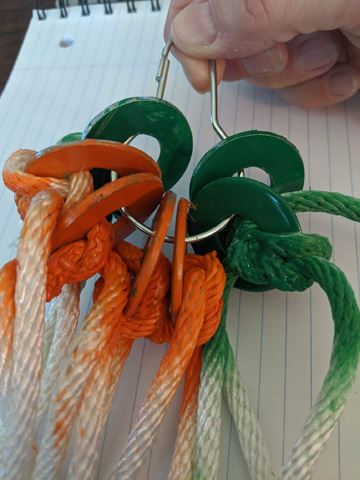 At the end of the session thread all the washers on a carabiner or shower curtain ring to keep them in order and ready for the next use.
|
 From Sandy White: